To do a dip exercise, you hold your body above the ground using parallel bars or a sturdy bench. You then lower your body by bending your elbows and push back up until your arms are straight. This movement works your chest, the backs of your arms (triceps), and your shoulders. Doing dips with good form is very important. It helps you avoid getting hurt and makes sure you work the right muscles.
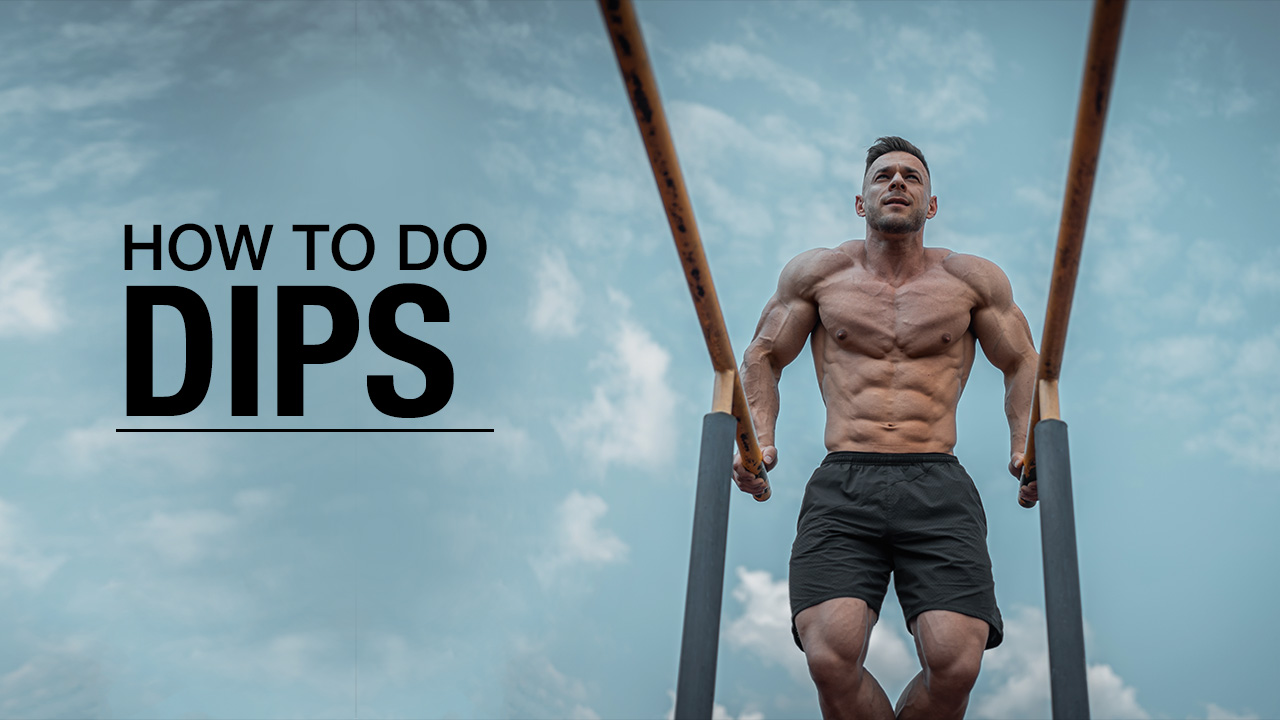
Image Source: learn.athleanx.com
Grasping Proper Dip Technique
Doing dips the right way is key. It’s not just about going up and down. It’s about how you move your body. Good form makes the exercise safer and more helpful. It helps you build strength in the right places.
The basic move is simple. You start with straight arms above the equipment. You bend your elbows to lower your body. Then you straighten your arms to push back up. But small things make a big difference. How wide your grip is, how far down you go, and where your elbows point all matter. Learning the correct proper dip technique will help you get the most from every rep.
The Muscles Dips Work
Dips are a compound exercise. This means they work several muscles at the same time. They are great for building upper body push strength.
Muscles Worked by Dips
- Triceps: These are the muscles on the back of your upper arms. They straighten your elbow. Dips are one of the best exercises for the triceps. Doing a triceps dip exercise really hits these muscles hard.
- Chest (Pectorals): Your chest muscles help push your arms down and forward. The lower part of your chest gets a lot of work in dips. If you lean forward, you use your chest muscles even more. This is the basis of the chest dip exercise.
- Shoulders (Deltoids): The front part of your shoulder muscles helps with the movement. They help control your body as you go up and down.
By changing how you do the dip a little bit, you can work one muscle more than others. We will talk more about this later when we look at dip exercise variations.
Mastering Parallel Bar Dips
The most common way to do dips is on parallel bars. This often involves using a dip station exercise setup. This setup is stable and lets you move freely. Doing parallel bar dips form correctly is important.
Parallel Bar Dips Form Step-by-Step
Follow these steps for a perfect parallel bar dip:
- Get Ready: Stand between the parallel bars of a dip station exercise. Jump up or step onto a support if needed. Grab the bars with your hands. Your hands should be right under your shoulders or slightly wider. Your arms should be straight. Your body should be held up by your arms. Your legs should hang below you. You can bend your knees and cross your ankles behind you if that feels better. Keep your body straight and tight. Don’t let your back arch too much.
- Go Down Slowly: Take a breath in. Start to bend your elbows slowly. Lower your body between the bars. Keep your elbows close to your body. Try not to let them flare out to the sides too much. As you go down, you can lean forward a little bit. This helps work your chest more (chest dip exercise). If you stay more upright, you work your triceps more (triceps dip exercise). Go down until your shoulders are just below your elbows. This is usually when your arms are bent at a bit more than a 90-degree angle. Make sure you feel a stretch in your chest or shoulders, but no pain.
- Push Up Strong: Breathe out. Push down into the bars with your hands. Use your chest, triceps, and shoulders to push your body back up. Straighten your arms. Go back to the start spot where your arms are straight. Keep your body tight as you push up. Do not swing or use momentum. Focus on using your muscles.
- Finish the Rep: When you get back to the top, your arms should be straight but not locked hard. Your shoulders should be down, away from your ears. Get ready for the next rep.
Key Points for Perfect Form
- Control is King: Do not drop quickly or bounce at the bottom. Move slowly and with control on the way down. This is called the eccentric part of the lift. It’s just as important as the push-up part.
- Elbow Position: Keep your elbows mostly tucked towards your sides. Letting them go out wide puts stress on your shoulders. A slight flare is okay, especially for chest dip exercise, but avoid going too wide.
- Shoulder Position: Keep your shoulders relaxed and down. Do not let them creep up towards your ears. This helps keep your shoulders safe.
- Depth: Go down until your shoulders are slightly below your elbows. Going much deeper than this can hurt your shoulders. Not going down enough means you are not getting the full benefit.
- Body Tightness: Keep your core muscles tight. Keep your legs stable. This helps your body move as one unit. It gives you a strong base to push from.
Following these steps and tips helps you do parallel bar dips form with power and safety.
Different Ways to Do Dips: Dip Exercise Variations
Not everyone can do full parallel bar dips right away. And even if you can, there are other types of dips that can help you. Trying different dip exercise variations can help you build strength, work muscles in new ways, or start easier.
Bench Dip Exercise
The bench dip exercise is a good starting point for many people. It uses a bench or sturdy chair.
- How to Do It: Sit on the edge of a bench. Put your hands on the bench next to your hips. Your fingers should point forward, off the edge of the bench. Slide your hips forward off the bench. Your body is now held up by your arms and feet. Your feet can be flat on the floor with knees bent (easier). Or your feet can be out straight, perhaps on another bench (harder).
- Movement: Keep your back close to the bench. Slowly bend your elbows and lower your body straight down. Go down until your elbows are bent to about 90 degrees. Your upper arms should be parallel to the floor. Do not go down too far. Push through your hands to straighten your arms and lift your body back up to the start.
- Tips: Keep your back close to the bench. Do not let your body swing away. Keep your shoulders down. This exercise works the triceps a lot. It’s a good way to build strength before trying bar dips or as a finishing exercise for your triceps workout.
Triceps Dip Exercise vs. Chest Dip Exercise (Form Differences)
We talked about how changing your form can target different muscles. Here’s how to do triceps dip exercise and chest dip exercise on parallel bars:
- Triceps Dip Exercise:
- Body Position: Keep your body as straight up and down as you can. Less lean forward.
- Elbows: Keep your elbows tucked in very close to your sides. They should point mostly backward.
- Depth: Go down until your upper arms are parallel to the floor. Your shoulders should be slightly below your elbows.
- Feel: You should feel the work mostly in the back of your upper arms (triceps).
- Chest Dip Exercise:
- Body Position: Lean your body forward more. Think about bringing your chin towards your chest slightly.
- Grip: A slightly wider grip on the bars can sometimes help, but it’s not needed. Focus on the lean.
- Elbows: Let your elbows flare out a bit more to the sides compared to triceps dips.
- Depth: Go down until your shoulders are clearly below your elbows. You should feel a stretch in your chest.
- Feel: You should feel the work mostly in your lower chest muscles.
Both types use the same basic movement. The difference is in your body angle and elbow position. Practicing both can give you a more complete upper body workout.
Using Help: The Assisted Dip Machine
For people who are just starting or cannot do many full dips, the assisted dip machine is a great tool.
- How it Works: This machine has a pad or platform you kneel or stand on. You choose how much weight you want the machine to “help” you with. More weight on the machine means the machine is pushing you up more, making the dip easier for you.
- Using It: Set the weight. Step onto the pad. Grab the handles or bars like you would for a regular dip. Lower your body slowly, letting the machine pad go down. Push up against the help from the machine.
- Benefits: The assisted dip machine lets you practice the proper dip technique and movement pattern. You can do more reps with good form. As you get stronger, you can lower the amount of help the machine gives you. This helps you work towards doing full bodyweight dip workout reps.
Making Dips Harder (Progression for Bodyweight Dip Workout)
Once you can do many reps of bodyweight dips with good form, you might want to make them harder. This is how you keep getting stronger. You can do this by adding weight.
- Adding Weight: The best way to add weight is using a dip belt. This is a special belt you wear around your waist. You can attach weight plates or dumbbells to it. This lets you add many pounds. Another way is to wear a weighted vest. You can also hold a dumbbell between your ankles, but this can be tricky.
- Other Ways:
- Slow Down (Tempo): Go down very slowly (like 3-5 seconds). Pause at the bottom for a second. Then push up. This makes your muscles work harder for longer.
- Pause: Pause at the bottom of the dip for a few seconds. This removes momentum and makes the push harder.
- More Reps: Just do more repetitions (reps) if you are still finding it challenging but not ready for added weight.
Making dips harder is part of a full bodyweight dip workout plan. It helps you keep making progress.
Common Slip-ups and How to Fix Them
Even with clear steps, it’s easy to make mistakes when doing dips. Knowing what they are and how to fix them keeps you safe and helps your progress.
- Going Too Low: Lowering your body too far down can put a lot of stress on your shoulder joints. If you feel a sharp pain in your shoulders at the bottom, you are likely going too low.
- Fix: Only go down until your shoulders are just below your elbows. Your upper arms should be roughly parallel to the floor (or slightly lower for chest dips, but still controlled). Stop the movement as soon as you feel any pinch or discomfort in your shoulder.
- Flared Elbows: Letting your elbows stick out wide to the sides, like chicken wings, puts bad stress on your shoulder joint and ligaments.
- Fix: Try to keep your elbows tucked closer to your body. Imagine pulling your elbows down towards your ribs as you lower yourself. This helps keep the stress on the triceps and chest, not the shoulder joint. For chest dip exercise, a little flare is okay, but it should still be controlled.
- Bouncing at the Bottom: Using the stretch at the bottom to bounce back up is bad. It does not use muscle strength and can hurt your joints.
- Fix: Control the whole movement. Go down slowly and smoothly. Pause slightly at the bottom if needed. Then push up using muscle power.
- Not Going Low Enough: Only doing small, short dips means you are not using the full range of motion. This limits how much strength and muscle you build.
- Fix: Work on increasing your depth slowly. Use the assisted dip machine or bench dip exercise to build strength through the full movement first if needed. Aim for the target depth where shoulders are below elbows, but stop if you feel pain.
- Swinging or Using Momentum: Swinging your legs or body to help push up means you are not using your muscles enough.
- Fix: Keep your core tight. Keep your legs still. Focus on a controlled push using your upper body muscles. If you have to swing, the exercise is too hard for you right now. Use an assisted dip machine or do bench dip exercise until you are stronger.
- Shoulders Shrugging Up: Letting your shoulders rise up towards your ears at the top or bottom of the movement.
- Fix: Keep your shoulders pulled down and back, away from your ears. Think about keeping a long neck. This helps keep your shoulder joint in a safe place.
Paying attention to these common mistakes and how to fix them will greatly improve your proper dip technique.
Is the Dip Exercise Right for You?
Dips are a great exercise, but they are not for everyone right away.
- Who can do them? People who have healthy shoulders and enough upper body strength. If you can do push-ups well, you might be ready to try dips.
- When to be careful: If you have had shoulder injuries in the past, or if your shoulders feel painful or unstable, dips might not be a good idea. The deep stretch at the bottom can be hard on the shoulder joint.
- Starting Easy: If full parallel bar dips are too hard or cause pain, start with easier dip exercise variations. The bench dip exercise or the assisted dip machine let you build strength and get used to the movement before doing full bodyweight dip workout reps. Always listen to your body. Pain is a sign to stop or change the exercise.
Building a Bodyweight Dip Workout
Dips can be a core part of an upper body strength plan. You can add them to your workout routine.
- How to Add Dips: Dips can be part of a push day (working chest, shoulders, triceps). Or they can be in a full body workout. You can do them after warmer exercises but before less demanding ones.
- Sets and Reps: How many you do depends on how strong you are.
- If you are just starting with assisted dip machine or bench dip exercise, try to do 3 sets of 8-12 reps with good form. Choose a help level or foot position that lets you do this.
- If you are doing full bodyweight dip workout, start with as many perfect reps as you can. If you can do 5-8 reps with good form, do 3 sets of that number.
- As you get stronger, try to do more reps (maybe up to 10-15). Then think about adding weight to keep getting stronger.
- Combine with Others: Dips pair well with pulling exercises like pull-ups or rows. This balances the push and pull muscles. You can also pair dips with other push exercises like push-ups or overhead presses, but be mindful of not overworking your muscles.
A good bodyweight dip workout uses the proper dip technique to build strength over time. It’s important to slowly add more challenge as you get stronger. This could be doing more reps, going slower, or adding weight.
Frequently Asked Questions (FAQ)
Here are some common questions about doing dips.
- Q: How many dips should I do?
- A: Start with what you can do with perfect form. For beginners, this might be 3-5 reps of full dips, or 8-12 reps on an assisted dip machine or doing bench dip exercise. Aim for 3 sets. As you get stronger, work towards doing 3 sets of 10-15 full dips before adding weight.
- Q: Why do dips hurt my shoulders?
- A: Shoulder pain during dips is often from bad form. You might be going too low, letting your elbows flare out too wide, or bouncing. It could also mean the exercise is too hard for your shoulders right now, or you have an old injury. Check your parallel bar dips form. Make sure you don’t go too deep and keep your elbows controlled. If pain continues, try easier versions like bench dip exercise or use the assisted dip machine. See a doctor if the pain is bad or does not go away.
- Q: Can beginners do dips?
- A: Yes, beginners can definitely work towards doing dips. They should start with easier dip exercise variations like the bench dip exercise or using the assisted dip machine. These help build the needed strength and teach the movement safely before attempting a full bodyweight dip workout.
- Q: What’s the difference between chest dips and triceps dips?
- A: The main difference is your body position and elbow angle. For triceps dip exercise, keep your body mostly upright and elbows tucked tight. For chest dip exercise, lean forward more and let your elbows go slightly wider. This small change in form targets different parts of your upper body muscles worked by dips.
- Q: Do I need a dip station exercise?
- A: A dip station exercise is great because it’s stable and made for dips. But you don’t always need one. You can use parallel bars at a park or gym. Strong gymnastic rings can also be used, though they are harder because they are not stable. For bench dip exercise, you just need a sturdy bench or chair.
Mastering the dip exercise takes practice and focus on form. By starting smart, using the right technique, and working through different dip exercise variations, you can safely build great upper body strength.