Yes, you can put gym mats on hardwood floors, and it is a great way to protect them. How do you protect your hardwood floors from gym equipment? You do this by placing thick, durable gym mats on top of the wood. This stops weights, machines, and sweat from damaging the surface. Using gym mats is one of the best ways for protecting hardwood floors gym mats are designed to absorb shock and spread weight.
Building a home gym on beautiful hardwood floors is a dream for many. But you also worry about keeping those floors nice. Heavy weights can fall. Machines have sharp edges. Sweat can cause stains. Hardwood is lovely, but it scratches and dents easily. Putting down gym mats is the answer. They create a safe, strong layer between your workout gear and your wood floor. This guide tells you how to do it yourself. We will cover everything from picking the right mat to putting it down the right way.
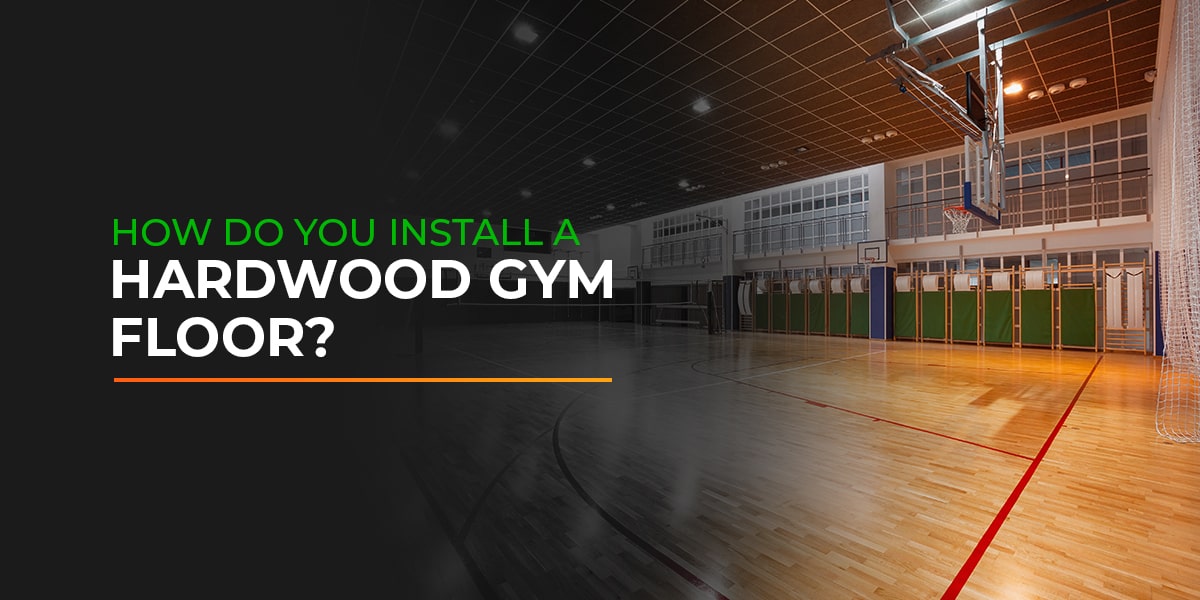
Image Source: www.cbasports.com
Why Use Gym Mats on Hardwood?
Hardwood floors look great. They add warmth and value to your home. But they are not made for dropping heavy things or scraping weights. Gym mats offer many benefits.
- Floor Protection: This is the main reason. Mats stop dents, scratches, and scuffs from weights and machines.
- Shock Absorption: Mats soak up the impact when you drop weights. This is better for the floor and quieter for people in your home.
- Grip and Safety: Mats often have a good grip. This stops your feet from slipping during exercises.
- Noise Reduction: Mats can help make your workout area quieter. They absorb sound from impacts.
- Comfort: Mats give a softer place to stand or do floor exercises than hard wood.
- Sweat Protection: Mats stop sweat from soaking into the wood. Sweat can stain or warp wood over time.
Choosing the right mat and putting it down properly is key. This makes sure your hardwood stays looking good while you get fit.
Grasping the Right Gym Mat for Wood Floors
Not all gym mats are the same. They come in different types and materials. Your choice depends on what kind of workouts you do. It also depends on how much protection your floor needs.
Types of Gym Mats
There are a few main types of gym mats used for home gyms.
- Rubber Mats: These are very tough and last a long time. They are great for areas with heavy weights. Rubber gym mat installation is common in many gyms.
- Pros: Excellent protection, very durable, good grip.
- Cons: Can be heavy, may have a rubber smell at first, can be more expensive. Some rubber might react with certain floor finishes over a very long time, but this is rare with proper care.
- Foam Mats: These are lighter and softer than rubber. They are good for bodyweight exercises, yoga, or light weights. Installing foam gym mats is easy because they are light. Many come as interlocking tiles.
- Pros: Lightweight, easy to move, good for comfort and light impact. Often cheaper.
- Cons: Less protection from heavy drops, can tear or dent more easily than rubber.
- Interlocking Tiles: These mats link together like puzzle pieces. They can be made of rubber, foam, or a mix. Interlocking gym floor tiles are popular because you can easily set up the size and shape you need.
- Pros: Easy to install, customize size, can replace just one tile if it gets hurt.
- Cons: Seams can separate slightly, may shift if not secured well.
- Roll-Out Mats: These are large sheets of rubber or foam that you unroll. They cover a big area with fewer seams.
- Pros: Covers large areas quickly, fewer seams.
- Cons: Harder to move or store, can be heavy.
Material Matters
The material affects how well the mat protects your floor.
- Recycled Rubber: Often used for thick gym mats. Very durable and protective. Can be dusty at first.
- Virgin Rubber: Cleaner and denser than recycled rubber. Often more expensive.
- EVA Foam: Common for lighter, softer mats and interlocking tiles. Good cushion but less protection for heavy drops.
- PVC: Sometimes used, but rubber is generally better for heavy-duty gym use on hardwood.
For protecting hardwood floors gym mats made of thick rubber (at least 1/4 inch, preferably 1/2 inch or more) are usually best for areas with free weights or heavy machines. For yoga or bodyweight, foam mats can work, but consider an underlayment layer for extra safety against light drops or spills.
Getting Your Space Ready
Before you start putting down mats, you need to get the area and the floor ready. This step is important for success.
Clear the Area
Take everything out of the space where your home gym will be. This means weights, machines, furniture, and anything else on the floor. You need a completely empty room or section.
Clean the Hardwood Floor
Your hardwood floor must be very clean and dry.
- Sweep or Vacuum: Get rid of all dust, dirt, and small bits. Use a vacuum with a brush attachment made for hardwood so it does not scratch.
- Wash the Floor: Use a cleaner made for hardwood floors. Make sure it is not too wet. Damp mop is usually best. Follow the cleaner maker’s directions.
- Let it Dry Completely: This is very important. Any wet spots could cause problems later. Open windows or use fans to help it dry fast.
- Check for Issues: Look closely at your hardwood floor. Are there any loose boards? Are there any sharp spots or splinters? Fix any problems before putting down mats.
A clean, smooth, dry floor helps the mats lay flat. It also helps if you use any underlayment or light adhesive later (though adhesive on wood needs care).
Prepare the Mats
Take your gym mats out of their boxes or rolls. Lay them flat in the area for at least 24-48 hours if possible. This lets them air out and flatten completely. Rubber mats, especially, can have a strong smell when new. Letting them air helps this smell go away.
Underlayment for Gym Mats on Hardwood
Should you put something under the gym mats on your hardwood floor? For extra protection, using an underlayment can be a good idea.
An underlayment is a layer that goes between the gym mat and your hardwood floor.
- Protects Finish: It adds another layer to protect the wood finish from rubbing or chemical reactions over time.
- Adds Cushion: Some underlayments add extra padding and shock absorption.
- Acts as a Barrier: It can help block moisture or sweat from reaching the wood.
- Prevents Shifting: Some underlayments have a non-slip surface that helps keep the mats in place.
What kind of underlayment?
- Felt or Rubber Padding: Similar to rug pads. Choose one made for use on hardwood floors that is non-slip and will not harm the finish. Look for pads made of natural rubber or felt, not PVC.
- Thin Foam Sheeting: Can add a little extra cushion and barrier.
- Specialty Flooring Underlayment: Some products are made as an underlayment for different flooring types. Make sure it is safe for hardwood.
Lay the underlayment down first if you choose to use it. Make sure it covers the whole area where the gym mats will go. Tape seams if needed, but use tape safe for floors or the underlayment itself. Using an underlayment for gym mats on hardwood adds peace of mind, especially if you have heavy equipment or want maximum protection.
DIY Gym Mat Installation on Wood: Step-by-Step
Installing gym mats yourself on a wood floor is a project most people can do. This is a guide for DIY gym mat installation on wood. The steps might change a little based on the type of mat you have.
Step 1: Plan Your Layout
Decide exactly where the mats will go. Will they cover the whole room or just a section? Draw a simple plan. Measure the area. Knowing the size of your mats helps you figure out how many you need and how they will fit. If you are using interlocking tiles, plan where your starting point will be. Often, starting in a corner or along a main wall works best.
Step 2: Lay the First Mats or Pieces
If you have roll-out mats, unroll them carefully in position. If you have tiles, start in a corner or along a straight wall. Place the first tile down. Make sure its edges are straight with the wall if you are starting in a corner.
Step 3: Connect the Mats
For interlocking gym floor tiles, line up the edges of the next tile with the first one. Push them together firmly so the teeth lock. Work your way across the area, row by row. Try to keep the rows straight. For rubber mats that are not tiles, lay them down side-by-side. Push them close together so there are no gaps.
Step 4: Cut Mats if Needed
You will likely need to cut mats to fit the edges of the room or around corners or poles. Learning how to cut gym mats properly is important for a good fit.
- Measure: Mark the cut line on the mat clearly. Use a straight edge like a metal ruler or a spare piece of mat.
- Use the Right Tool: A sharp utility knife with extra blades is usually needed. For thick rubber, a jigsaw with a fine-tooth blade or a special rubber-cutting blade works better and is faster.
- Cut Safely: Always cut on a surface you do not mind cutting into, like a scrap piece of wood or thick cardboard. Cut away from your body. For thick mats, you may need to make several passes with the knife. Follow safety steps for power tools if using a jigsaw.
- Test Fit: Check the cut piece. Does it fit? Trim a little more if needed.
Step 5: Fill the Area
Keep laying and connecting mats or tiles. Cut pieces as needed to fill the space. Work towards the opposite walls. Try to keep the mats fitting together tightly.
Step 6: Make Adjustments
Once all the full pieces and cut pieces are in place, check the whole area. Are there any gaps? Are the edges tight? You might need to shift the whole mat area slightly to make everything fit better.
This DIY gym mat installation on wood is faster with interlocking tiles but works for all types with careful planning and cutting.
Securing Gym Mats Without Glue
The best way to protect your hardwood floor is to avoid using glue or permanent adhesives directly on it. Securing gym mats without glue is often the safest and best approach for hardwood floors.
Why Avoid Glue on Hardwood?
- Damage: Gym mat adhesive for wood floors can be very hard to remove. It can strip the finish or even damage the wood surface when you try to take it up later.
- Permanent: Glue makes the mats a permanent part of the floor. You cannot easily move them or take them up for cleaning or floor maintenance.
- Moisture Trapping: Glue can trap moisture between the mat and the wood, possibly causing wood damage over time.
Ways to Secure Mats Without Glue
There are good ways to keep your mats from shifting without harming your wood floor.
- Weight of the Mats: Thick rubber mats are heavy. Often, their own weight is enough to keep them in place, especially in a dedicated area with equipment on them.
- Wall-to-Wall Fit: If the mats fill the entire room from wall to wall, they are held in place by the walls. This is a very effective way of securing gym mats without glue. You might need to use cut pieces at the edges to make it a tight fit.
- Using Equipment Weight: Placing heavy gym equipment like treadmills, weight racks, or benches on top of the mats helps hold them down. Make sure the weight is spread out to avoid dents in the mats themselves.
- Non-Slip Underlayment: As mentioned before, a non-slip underlayment placed between the wood and the mat can help stop the mat from sliding.
- Double-Sided Rug Tape (Use with Caution): If mats still shift a little, you could use a minimal amount of double-sided rug tape. HOWEVER, you must use a type specifically marked safe for hardwood floors and floor finishes. Test it in a small, hidden spot first to make sure it does not damage the finish when removed. Only use small pieces at the edges or corners, not large strips. This is a last resort and still carries some risk to the finish. Securing gym mats without glue using tape is risky for hardwood.
For most home gyms on hardwood, especially those with interlocking gym floor tiles or heavy rubber, relying on a tight fit and the weight of equipment is the best method for securing gym mats without glue and protecting the floor.
Caring for Your Gym Mats and Hardwood
Keeping your gym mats and the floor under them clean is important. This helps the mats last longer and keeps your hardwood safe.
Cleaning the Mats
How you clean depends on the mat material.
- Rubber Mats: Sweep or vacuum loose dirt. Wipe down with a damp cloth and a mild soap or a cleaner made for rubber floors. Avoid harsh chemicals or anything with oils, which can break down rubber. Rinse with a damp cloth and let air dry.
- Foam Mats: These are easier to clean. Wipe with a damp cloth and mild soap. Do not use abrasive cleaners. Let them dry fully.
- Interlocking Tiles: You can clean these in place like rubber or foam. For a very deep clean, you can take them apart and wash them outside, but this is usually not needed.
Clean up spills, especially sweat, quickly. This stops smells and keeps the mats hygienic.
Checking the Hardwood Floor
Even with mats down, it’s a good idea to check your hardwood floor from time to time.
- Lift up the mats (or a section of them) every few months or once a year.
- Sweep and clean the hardwood underneath.
- Look for any signs of moisture, staining, or wear.
- Fix any small problems before they get bigger.
This regular check is part of protecting hardwood floors gym mats cover. It makes sure the mats are doing their job and not causing hidden issues.
How to Cut Gym Mats for a Perfect Fit
Getting clean cuts is important for a good-looking and safe gym floor. Whether you have rubber, foam, or interlocking tiles, you might need to cut.
Tools You Need
- Sharp Utility Knife: Get one with a strong handle and lots of new, sharp blades. Blades get dull fast when cutting rubber or foam.
- Straight Edge: A long metal ruler or a sturdy straight piece of wood or metal. This guides your knife for a straight cut.
- Cutting Surface: A piece of scrap plywood, thick cardboard, or a self-healing cutting mat. Never cut directly on your hardwood floor!
- Measuring Tape and Pencil/Marker: To mark your cut lines.
- Safety Gloves: Protect your hands.
- Safety Glasses: Protect your eyes, especially if using power tools.
- Jigsaw (Optional, for thick rubber): If cutting thick rubber mats (1/2 inch or more), a jigsaw can be much faster and give a cleaner edge. Use a blade meant for rubber, plastic, or fine wood cutting.
Steps for Cutting with a Utility Knife
- Measure and Mark: Measure where you need to cut. Transfer this measurement to the mat. Use your straight edge and pencil or marker to draw a clear line.
- Position the Mat: Place the mat on your cutting surface. Make sure the cut line is over the scrap material.
- Line Up the Straight Edge: Place your straight edge along the line you drew. Hold it firmly.
- Score the Mat: Use your sharp utility knife to score (make a shallow cut) along the straight edge. Do not try to cut all the way through at once.
- Make Multiple Passes: Go over the cut line again and again, pressing a little harder each time. The sharp blade will cut deeper with each pass. This is safer and gives a cleaner cut than trying to cut through thick material at once. Keep the knife against the straight edge.
- Separate the Pieces: Once you have cut most of the way through, you may be able to bend the mat to snap it along the cut line, or you might need one final pass.
- Clean the Edge: The cut edge might be a little rough. You can trim off small bits carefully with the knife.
Steps for Cutting Thick Rubber with a Jigsaw
- Measure and Mark: Mark your cut line.
- Position the Mat: Place the mat on your cutting surface. Make sure the area under the cut line is supported but allows the blade to pass through (e.g., raise the mat slightly on two blocks).
- Choose the Blade: Use a blade suitable for rubber or plastic. A fine-tooth blade gives a cleaner cut.
- Cut Slowly: Start the jigsaw. Guide it slowly and steadily along your marked line. Do not force the saw. Let the blade do the work. Cutting too fast can make the edge ragged or melt the rubber.
- Finish: Smooth any rough edges with the utility knife if needed.
Knowing how to cut gym mats well helps you get a tight, custom fit for your space. This looks better and helps keep the mats from shifting.
Home Gym Flooring Options Hardwood Owners Consider
If you have hardwood floors, gym mats are the most common and often best choice for protection. But what other options do people think about?
- Leaving the Wood Bare: Only suitable for very light exercises with no weights or machines (like pure yoga or stretching). Even bodyweight exercises can cause sweat damage or scuffs over time. Not recommended for any significant home gym use on hardwood.
- Area Rugs: A thick rug might offer some scratch protection from light equipment, but it does not protect against dropped weights, heavy impact, or significant moisture. It’s not designed for gym use.
- Carpet Tiles: Offer some padding and can be easy to install. However, they do not have the density or durability needed for heavy weights or machines. They also soak up sweat and can become hard to clean and smelly.
- Plastic or Vinyl Sheeting: Can protect from scratches and spills but offer no impact absorption. Heavy weights can still dent the wood right through thin plastic. Some plastics can also react with wood finishes over time.
- Building a Raised Platform: A more complex and costly option. You build a wooden frame and cover it with plywood, then potentially add a top layer like rubber matting or wood. This lifts the gym area off the hardwood completely. Good for very heavy lifting but takes up more space and is a big project.
Comparing these home gym flooring options hardwood owners look at, gym mats clearly offer the best balance of protection, shock absorption, ease of installation (especially DIY gym mat installation on wood), and cost-effectiveness for most home gym setups. Rubber mats are especially good for protecting hardwood floors gym mats of other materials might not handle heavy use as well.
Important Tips for Success
- Measure Twice, Cut Once: This old rule is true for cutting mats. Be sure of your measurements before you cut.
- Use Sharp Blades: A dull blade makes cutting much harder and gives a poor result. Change utility knife blades often.
- Ventilation: If using rubber mats, let them air out before and during installation, especially in a well-vented area. The smell fades over time.
- Get Help: Thick rubber mats are heavy. Get a friend to help you move and place them if possible.
- Keep it Clean: Regularly cleaning your mats helps them last and keeps your gym space nice.
Installing gym mats on your hardwood floor is a smart move. It protects your valuable floor, makes your workout area safer and more comfortable, and lets you build the home gym you want without constant worry about damage. By picking the right mats, preparing your space well, and following these steps for DIY gym mat installation on wood, you can easily set up a great workout area while keeping your beautiful hardwood floors safe.
Frequently Asked Questions (FAQ)
h4> Do gym mats damage hardwood floors?
No, gym mats are meant to protect hardwood floors. They spread out the weight and absorb impact. This stops dents and scratches from weights and machines. But, using the wrong mat or adhesive can cause problems. Choose mats made for gym use and avoid glue directly on the wood.
h4> How thick should a gym mat be for hardwood?
For general exercise like yoga or bodyweight, 1/4 inch foam can be okay, but maybe add an underlayment. For free weights or machines, choose thicker rubber mats, at least 1/4 inch, but 1/2 inch or 3/4 inch is much better for serious weightlifting. Thicker mats offer more protection.
h4> Can I use interlocking foam tiles on hardwood?
Yes, you can use interlocking foam gym mats on hardwood. They are good for lighter activities. However, they do not offer as much protection as rubber for heavy drops. Consider a tougher mat or an underlayment if you plan to use weights.
h4> Will rubber mats stain hardwood floors?
Most modern gym-grade rubber mats are made to be colorfast and should not stain hardwood finishes. However, some very old or low-quality rubber products, or those left in place for many years with moisture trapped underneath, could cause issues. Using a protective underlayment is an extra safeguard. Also, clean up spills quickly.
h4> Is gym mat adhesive safe for wood floors?
Generally, no. Gym mat adhesive for wood floors can stick too strongly and damage the finish or wood when removed. It’s best to use methods for securing gym mats without glue, like a tight fit, mat weight, or equipment weight. If you must use tape, test a small, hidden area first with a type made for hardwood.
h4> How do I stop gym mats from sliding on hardwood?
For securing gym mats without glue, try these: Make sure the mat area fits tightly wall-to-wall. Use a non-slip underlayment designed for hardwood. Place heavy equipment on the mats. The weight of thick mats helps too.
h4> Can I put heavy weight machines directly on gym mats on hardwood?
Yes, that’s what the mats are for. The mats protect the hardwood from the machine’s weight and feet. Make sure the mats are thick enough (1/2 inch or more rubber is best for heavy machines) to spread the machine’s weight and prevent dents through the mat.
h4> How often should I clean under my gym mats?
It is a good idea to lift the mats and clean the hardwood underneath every few months or at least once a year. This lets you clean any dust or debris that got underneath and check the condition of your hardwood floor.
h4> What is the best way to cut thick rubber gym mats?
For thick rubber (1/2 inch+), a jigsaw with a blade made for rubber or a fine-tooth wood blade works well and is faster than a utility knife. A very sharp utility knife can work, but requires many passes and more effort. Always use a cutting surface and safety gear.