Ever wonder why some 3D prints come out perfect, while others look a little… wonky? A big part of that magic happens before the printer even starts moving. It’s all thanks to something called a “slicer,” and for your Ender 3, picking the right one can feel like a puzzle.
You’ve probably noticed there are a lot of slicer programs out there. Some are free, some cost money, and they all promise amazing results. But which one is actually best for your Ender 3? It’s tough to know where to start, and the wrong choice can lead to frustrating prints, wasted filament, and a lot of head-scratching. We want your Ender 3 to create awesome things, not headaches!
In this post, we’re going to break down the best slicer options for your Ender 3. We’ll look at what makes each one special, what features are important, and how to pick the one that fits your printing style and skill level. Get ready to unlock your Ender 3’s full potential and start making those perfect prints you’ve been dreaming of!
Our Top 5 Slicer For Ender 3 Recommendations at a Glance
Top 5 Slicer For Ender 3 Detailed Reviews
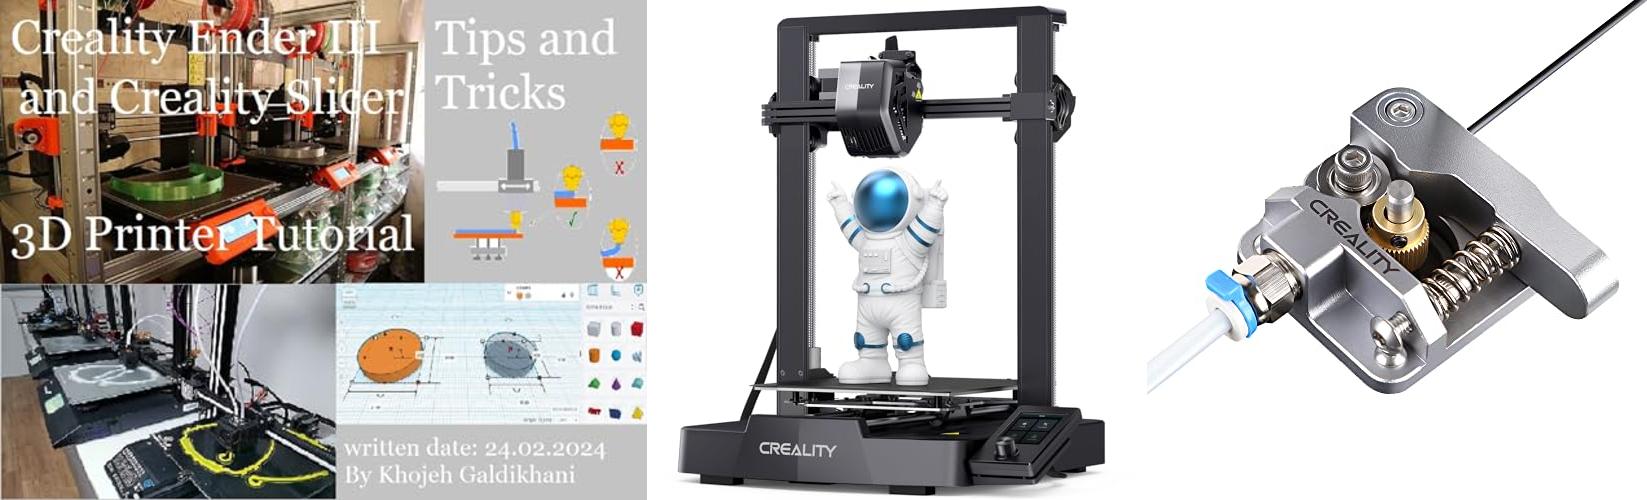
1. Creality Ender 3 and Creality Slicer Tutorial for 3D printers and tips and tricks.: 3D print Tutorial Tips and Tricks for Creality Ender 3 and Creality Slicer

Rating: 9.1/10
This Creality Ender 3 and Creality Slicer Tutorial for 3D printers and tips and tricks is your ultimate guide to getting started with 3D printing. It helps you understand your Creality Ender 3 printer and the Creality Slicer software. You will learn how to set up your printer and prepare your 3D models for printing. This tutorial is packed with helpful advice and easy-to-follow steps.
What We Like:
- Clear and easy-to-understand instructions for beginners.
- Covers both the Ender 3 printer and its recommended slicer software.
- Offers useful tips and tricks to improve print quality.
- Helps users avoid common printing problems.
- Empowers you to create amazing 3D prints.
What Could Be Improved:
- Could include more advanced troubleshooting for specific issues.
- More visual examples of common print failures and their fixes would be helpful.
- A section on different filament types and their settings would be a great addition.
This tutorial is an excellent resource for anyone new to 3D printing with the Creality Ender 3. It will help you unlock the full potential of your printer and enjoy the exciting world of 3D creation.
2. Creality Ender 3 V3 SE 3D Printer

Rating: 8.7/10
The Creality Ender 3 V3 SE 3D Printer is a fantastic upgrade for anyone looking to create amazing 3D prints faster and easier. It boasts impressive speed, smart leveling technology, and a reliable extruder, making it a great choice for both beginners and experienced makers.
What We Like:
- Blazing Fast Prints: It prints up to 250mm/s, saving you a lot of time compared to other printers.
- Powerful Sprite Extruder: The “Sprite” direct extruder is upgraded and works very well with different filaments like PLA, TPU, and PETG. It pushes filament smoothly.
- Effortless Auto Leveling: The CR Touch sensor and strain sensor handle all the leveling for you, so you don’t have to do it manually.
- Stable Printing: The dual Z-axis and strong Y-axis linear shafts keep your prints steady and accurate.
- Easy Setup: You can assemble it in just 3 steps and be ready to print in about 20 minutes.
- Simple Filament Changes: Auto filament loading and unloading make swapping out spools a breeze.
- Reliable Support: Creality offers a 12-month warranty and quick customer support.
What Could Be Improved:
- While it’s an upgrade, some users might want even more advanced features for highly specialized prints.
- The 250mm/s speed is great, but achieving perfect quality at that speed might require some fine-tuning for certain complex models.
This printer offers a great balance of speed, ease of use, and print quality. It’s a solid choice for bringing your 3D printing ideas to life.
3. Creality Official Ender 3 Extruder Upgrade Metal Drive Feeder 3D Printer Parts for Ender-3 Pro/3S/3 V2/3 Max CR-10/10S Gray Aluminum 1.75mm Filament Extruder

Rating: 9.0/10
Upgrade your 3D printing game with the Creality Official Ender 3 Extruder Upgrade Metal Drive Feeder. This high-quality aluminum extruder is designed to replace your stock plastic one, giving your Ender-3 Pro, Ender-3S, Ender-3 V2, Ender-3 Max, CR-10, or CR-10S printer a serious boost in performance. It’s built to last and works much better than the original part.
What We Like:
- Built tough with high-quality aluminum alloy and a special surface treatment for long-lasting use.
- Improved filament feeding with adjustable pressure, ensuring a strong push into the nozzle.
- Handles a wide range of filaments like PLA, ABS, Wood, TPU, and PTEG with its 40-tooth drive gear.
- The beveled filament intake prevents scraping, keeping your prints smooth.
- Easy to assemble and install, with all necessary parts and clear instructions included.
- Comes with excellent after-sales support, including 24/7 customer service and technical help.
What Could Be Improved:
- It’s a DIY kit, so you’ll need to assemble it yourself, which might be a small challenge for some.
This metal extruder upgrade is a fantastic investment for any Ender-3 or CR-10 series printer owner looking for better reliability and print quality. It’s an easy way to get more out of your 3D printer.
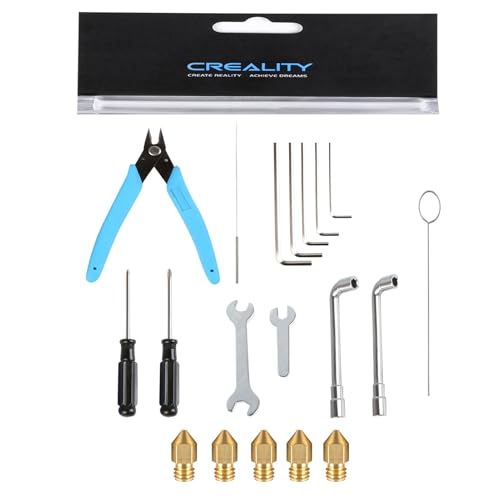
4. Creality Original Maintenance Common Tool Kit with 5pcs Brass Nozzles
Rating: 8.9/10
Keep your Creality 3D printer running smoothly with the Creality Original Maintenance Common Tool Kit. This kit is designed specifically for popular Ender 3 series printers, including the Ender 3, Ender 3 Pro, Ender 3 V2, Ender 3 Neo, Ender 3 V2 Neo, and Ender 3 Max Neo. It even works with some Ender 3 S1 models! Inside, you’ll find essential tools to help you with maintenance and upgrades. The kit includes a variety of helpful items like shear pliers, an Allen wrench, a needle cleaner, a socket wrench, and a cross screwdriver. You also get five brand-new brass nozzles, perfect for ensuring your prints are detailed and neat.
What We Like:
- Includes all the basic tools you need for printer upkeep.
- Comes with five new brass nozzles for better print quality.
- Specially made for many popular Ender 3 models.
- All parts are original Creality, so they fit perfectly.
- The new nozzle design helps create smoother, more detailed prints.
What Could Be Improved:
- The kit might not include more advanced tools for complex repairs.
- Specific accessory details are only shown in a diagram, which could be clearer in text.
This Creality tool kit is a smart investment for any Ender 3 owner. It helps you keep your printer in top shape and improve your printing results.
5. Creality Ender 3 V3 SE 3D Printer

Rating: 8.9/10
The Creality Ender 3 V3 SE 3D Printer is a fantastic machine for anyone looking to jump into 3D printing. It boasts impressive speed and user-friendly features, making it a great choice for beginners and experienced makers alike. With its generous build volume, you can create a wide range of projects.
What We Like:
- Super Speedy Printing: This printer can print at a blazing 250mm/s, which is much faster than many other printers. You’ll save lots of time waiting for your prints to finish.
- Easy Setup: You can get this printer up and running in about 20 minutes with just 3 simple steps. It’s perfect for beginners who don’t want a complicated setup process.
- Automatic Leveling: The CR Touch and strain sensor make auto-leveling a breeze. This means you’ll get a perfect first layer every time, which is super important for good prints.
- Reliable Extruder: The “Sprite” Direct Extruder is proven to be reliable and can handle different types of plastic filament like PLA, PETG, and TPU.
- Stable Design: The dual Z-axis and Y-axis with strong steel shafts keep the printer very stable. This leads to better print quality and a machine that lasts longer.
- Quiet Operation: The 32-bit silent mainboard makes printing much quieter, so it won’t disturb you while it’s working.
- Easy Filament Handling: Loading and unloading filament is a one-tap job, making it super easy to switch colors or materials.
What Could Be Improved:
- Power Supply Setting: You need to make sure the power supply is set to the correct voltage (115V) before you turn it on. This is an extra step to remember.
The Creality Ender 3 V3 SE offers a fast, reliable, and user-friendly 3D printing experience. It’s an excellent option for those wanting to create quickly and easily.
Choosing the Right Slicer for Your Ender 3: A Beginner’s Guide
So, you’ve got an Ender 3 3D printer. That’s awesome! Now you need software to turn your 3D models into instructions your printer can understand. This software is called a “slicer.” It cuts your model into thin layers and figures out how the printer should move to build each layer. Picking the right slicer is super important for getting great prints. Let’s dive in!
What to Look For: Key Features of a Great Slicer
When you’re picking a slicer for your Ender 3, keep these important features in mind:
- Ease of Use: If you’re new to 3D printing, you want a slicer that’s simple to understand. Lots of menus and confusing settings can be overwhelming. Look for a program with a clean layout and helpful tooltips.
- Customization Options: As you get more experienced, you’ll want to tweak settings. Good slicers let you change things like print speed, layer height, and how much support material is used. This helps you get the best possible print quality.
- Profile Support: The best slicers come with pre-made settings (profiles) for popular printers like the Ender 3. This saves you a lot of time and guesswork. You can usually find profiles for different filament types too, like PLA or PETG.
- Preview Function: Before you send your print to the machine, you want to see what it will look like. A good slicer shows you a preview of each layer. You can even see how the printer’s nozzle will move. This helps you catch mistakes before they happen.
- Regular Updates: The 3D printing world changes fast. Slicers get updated often to add new features and fix bugs. A slicer that’s updated regularly is usually a sign of a well-supported program.
What’s it Made Of? Important Materials (Filament)
Your slicer doesn’t really have “materials” in the way a printer does. However, it needs to know what material you’re printing with! The most common filament for the Ender 3 is PLA. Other popular choices include PETG and ABS. Your slicer needs to understand the properties of these materials. It needs to know how hot to heat the nozzle and print bed for each one. It also needs to know how fast the material flows.
Making Good Prints: Factors that Improve or Reduce Quality
Several things affect how good your prints turn out. Your slicer plays a big role!
- Layer Height: This is how thick each layer is. Thinner layers (like 0.1mm) make for smoother prints but take longer. Thicker layers (like 0.3mm) print faster but might show layer lines more.
- Print Speed: Printing too fast can cause problems. The filament might not melt properly or the printer might not move smoothly. Printing too slow can make the plastic ooze and create messy prints. Your slicer helps you find the right balance.
- Infill: This is the inside structure of your print. You can make it solid or hollow with a pattern inside. Less infill means faster prints and less material used. More infill makes your print stronger.
- Supports: If your model has overhangs (parts that stick out in the air), it needs support. Your slicer can automatically add these temporary structures. Good support settings make overhangs print well and are easy to remove later. Bad support settings can be hard to remove and damage your print.
Using Your Slicer: User Experience and Use Cases
The user experience is how easy and enjoyable it is to use the slicer. For beginners, a simple interface with clear options is best. Advanced users will appreciate more control over every setting.
Here are some common ways people use slicers with their Ender 3:
- Making Toys and Figures: You can download models online and print them as fun toys or cool display pieces.
- Creating Useful Gadgets: Need a phone stand? A cable organizer? Your Ender 3 and a slicer can help you make practical items for your home or office.
- Prototyping: If you’re designing something, you can print prototypes to test how they look and fit before making the final version.
- Custom Parts: You can design and print replacement parts for things that are broken.
Frequently Asked Questions (FAQ) for Ender 3 Slicers
Q: What are the main Key Features I should look for in a slicer?
A: You should look for ease of use, good customization options, printer profile support, a preview function, and regular software updates.
Q: Do I need to buy a slicer, or are there free ones?
A: There are excellent free slicers available, like Cura and PrusaSlicer. Many paid slicers also offer free versions or trials.
Q: How does the slicer know what filament I am using?
A: You tell the slicer what filament you are using. You select a filament profile, which has settings for temperature, flow rate, and other material properties.
Q: Can a bad slicer setting ruin my print?
A: Yes, it can. Incorrect settings for temperature, speed, or supports can lead to failed prints, poor quality, or damage to your 3D printer.
Q: What is “layer height” and why is it important?
A: Layer height is the thickness of each printed layer. Smaller layer heights create smoother prints but take longer. Larger layer heights print faster but may show more visible layer lines.
Q: How do I know if my slicer has good support settings?
A: Good support settings create structures that are easy to remove without damaging the main print. You can often test this by printing a model with known overhangs.
Q: Is it hard to learn how to use a slicer?
A: It can seem a little tricky at first, but most slicers are designed to be user-friendly. There are many online tutorials and guides to help you learn.
Q: What is “infill” and how does it affect my print?
A: Infill is the internal structure of a 3D print. It affects the strength and weight of the object. You can choose different patterns and percentages for infill.
Q: Can I use the same slicer settings for all my Ender 3 prints?
A: No, you will need to adjust settings based on the model you are printing, the type of filament you are using, and the desired print quality.
Q: Where can I find pre-made slicer profiles for the Ender 3?
A: Many slicers come with built-in Ender 3 profiles. You can also find community-made profiles on websites like Thingiverse and Reddit.
In conclusion, every product has unique features and benefits. We hope this review helps you decide if it meets your needs. An informed choice ensures the best experience.
If you have any questions or feedback, please share them in the comments. Your input helps everyone. Thank you for reading.